AI Image Generation
Generate professional, custom images using AI. No complex prompts needed—choose a style, describe your subject, and generate.
Accessing AI Image Generation
Section titled “Accessing AI Image Generation”- Click AI in the left sidebar (the AI button is highlighted in blue)
- The AI Generator panel opens on the right side of the canvas
- Follow the 3-step wizard to generate your image
How It Works
Section titled “How It Works”The AI Image Generator uses a simple 3-step process:
- Choose Style - Select a visual style preset
- Describe Subject - Tell the AI what you want in the image
- Generate - Choose aspect ratio and generate
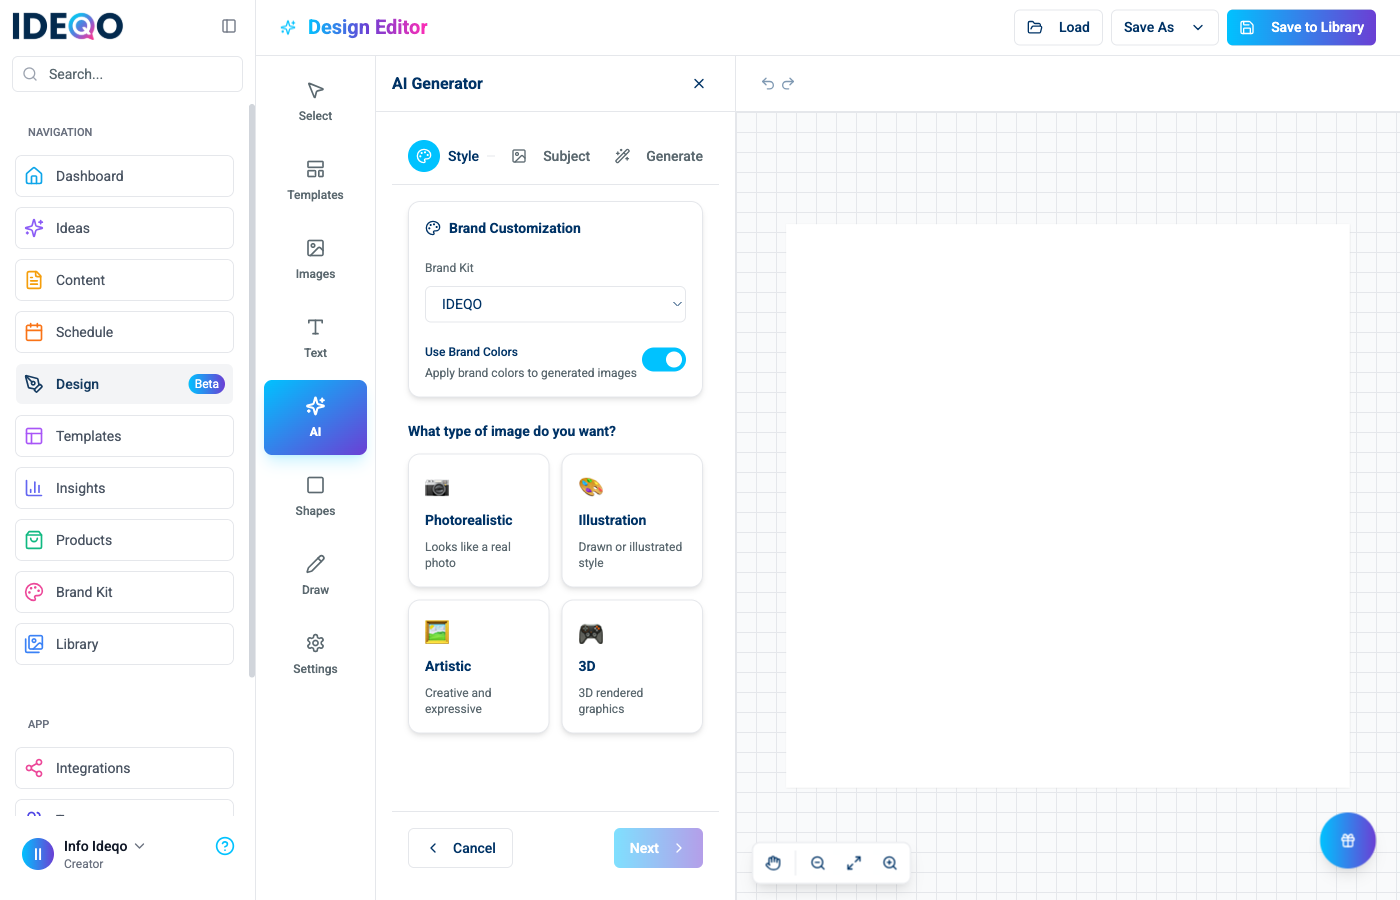
Step 1: Choose Style
Section titled “Step 1: Choose Style”Style presets automatically use your brand colors:
- Photorealistic - Looks like a real photo
- Illustration - Drawn or illustrated style
- Artistic - Creative and expressive
- 3D - 3D rendered graphics
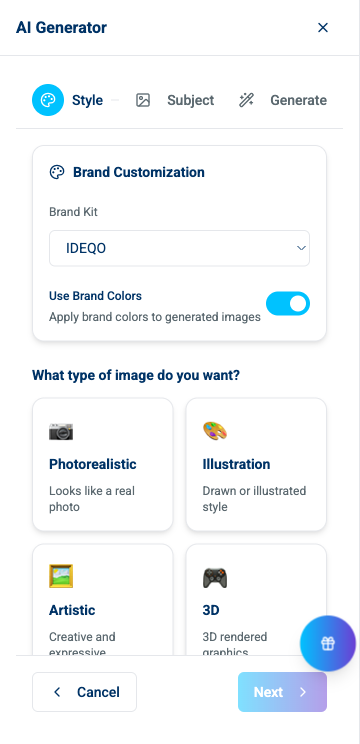
- Browse the style preset cards in a 2x2 grid
- Each preset shows an icon, name, and description
- Click a style card to select it
- The selected card highlights with a blue border
- The wizard automatically advances to the next step after selection
Step 2: Describe Subject
Section titled “Step 2: Describe Subject”After choosing a style, describe what you want:

- Type a brief description in the text field
- Be specific about the subject, setting, or mood
- Examples:
- “A sunset over mountains”
- “A modern office workspace”
- “A cup of coffee on a wooden table”
- “Abstract geometric patterns”
Step 3: Generate
Section titled “Step 3: Generate”Before generating, choose your aspect ratio:
- 1:1 (Square) - Perfect for Instagram posts
- 9:16 (Portrait) - Great for Instagram Stories and mobile content
- 16:9 (Landscape) - Ideal for YouTube thumbnails and wide formats
- 4:3 (Classic) - Traditional photo format
- Select your desired aspect ratio
- Review the summary showing your style and subject
- Click Generate Image
- Wait for generation (usually 10-30 seconds)
Brand Customization
Section titled “Brand Customization”The AI Generator integrates with your brand kit:
- Use Brand Colors - Toggle to automatically use your brand colors
- Select Brand Kit - Choose which brand kit to use (if you have multiple)
- Custom Colors - Optionally override with custom colors
Brand colors automatically apply to style presets, ensuring generated images match your brand identity.
Viewing Generated Images
Section titled “Viewing Generated Images”Once generation completes:
- The generated image appears in the panel
- Preview the image before adding it
- Click Insert to Canvas to add it to your design
- The image automatically sizes to fill your canvas
Generating Another Image
Section titled “Generating Another Image”Generate a new image:
- Click Generate Another or Reset
- Start over from Step 1 (Style selection)
- Or modify your subject description and generate again
Troubleshooting
Section titled “Troubleshooting”Generation Fails
Section titled “Generation Fails”- Check your internet connection
- Try a different subject description
- Verify you have available AI credits (check your plan limits)
- Contact support if issues persist
Image Doesn’t Match Expectations
Section titled “Image Doesn’t Match Expectations”- Try a more specific subject description
- Experiment with different style presets
- Adjust your brand colors if using brand customization
- Generate multiple variations to find the best result
Usage Limits
Section titled “Usage Limits”AI image generation uses credits from your plan:
- Check your usage in Settings > Billing > AI Usage
- Upgrade your plan if you need more credits
- Generated images save to your library for reuse
- Use Brand Colors - Enable brand color integration for consistent visuals
- Be Specific - Clear, focused descriptions produce better results
- Try Different Styles - Experiment with various style presets
- Generate Multiple Versions - Create several variations to choose from
- Match Your Canvas - Choose aspect ratios that match your canvas size
- Start Simple - Begin with straightforward descriptions, then get more creative
What’s Next?
Section titled “What’s Next?”- Learn about Templates - Start with pre-designed layouts
- Learn about Images - Upload and manage images
- Learn about Saving & Exporting - Save your AI-generated designs
Need help? Contact support or check out our other design editor guides.