
You have 200 products in your Shopify store. You’re posting maybe 3 per week on Instagram. At that rate, most of your catalog never sees social media.
Auto-posting fixes this. Connect your store, set your rules, and let your products show up on every platform on autopilot.
Key Takeaways
- Auto-posting turns your catalog into content. Every product becomes a social media post without manual work.
- Smart selection beats random posting. Feature bestsellers, new arrivals, sale items, or specific collections automatically.
- AI captions + Brand Voice = posts that sound like you. Not generic. Not robotic. Your tone, every time.
- One setup, multiple platforms. Post to Instagram, TikTok, Facebook, Pinterest, and more from a single workflow.
- Draft or auto-publish. Your call. Review everything first, or let it run hands-free.
Why manual product posting doesn’t scale
You created a great product. You shot the photos. Now you need to post it on Instagram, TikTok, Facebook, and Pinterest. Write four different captions. Pick the right hashtags. Schedule at the right times. Repeat for every product, every week.
That’s 15+ hours of work for a small catalog. For a store with hundreds of products, it’s impossible to do manually.
Most Shopify owners fall into one of two traps. They post the same 10 products over and over. Or they stop posting entirely during busy weeks.

Either way, your catalog isn’t working for you on social media. Products that could drive sales sit invisible. Your posting frequency drops and the algorithm stops showing your content.
Auto-posting solves this by turning your product catalog into a content engine. You set the rules once. The system creates and publishes posts on your schedule, across every platform.
What you can auto-post (and what works best)
Not everything should be auto-posted. Here’s what works and what to keep manual.
Product posts (highest ROI)
This is the core use case. Your Shopify products become social media posts automatically. The system pulls product images, titles, descriptions, and prices. Then it generates platform-specific captions and publishes on schedule.
What makes product auto-posts work:
- High-quality product images (the system uses your existing Shopify photos)
- AI-generated captions that highlight benefits, not just features
- Platform-specific formatting (carousel for Instagram, vertical for TikTok, SEO-rich for Pinterest)
- Hashtags and keywords added automatically
Holiday and seasonal content
Holiday posts drive engagement and sales. But planning them manually means tracking dozens of dates and creating content for each one.
Auto-posting tools with holiday automation pull from a holiday calendar. They generate themed content and schedule it automatically. Valentine’s Day gift guide. Black Friday countdown. Summer sale kickoff. You pick which holidays matter for your brand. The system handles the rest.
Inspirational and lifestyle content
Your feed can’t be 100% product shots. It needs variety. Auto-posting systems can mix in quotes, lifestyle imagery, and branded content between product posts.
This keeps your feed balanced. A product post on Monday, an inspirational quote on Wednesday, a lifestyle image on Friday. All scheduled, all on-brand.
Custom branded content
Have a recurring content theme? Like “Tip Tuesday” or “Behind the Scenes Friday”? Set it up once as a custom content type. Give the AI your topic, tone, and style. It generates fresh posts on your schedule without repeating itself.
How to set up auto-posting step by step
Here’s the actual workflow. We’ll walk through each step so you can go from zero to automated in one session.
Step 1: Connect your Shopify store
Link your Shopify store to your auto-posting tool. This syncs your entire product catalog. Images, titles, descriptions, prices, collections. Everything comes over automatically.
IDEQO connects to Shopify through a secure integration. Your products sync in real time. When you add new products or update existing ones, the changes carry over.
Once connected, you’ll see your full product catalog inside the tool. No manual uploading. No copy-pasting product details.
Step 2: Pick your products smartly
Don’t post every product randomly. Use a selection strategy that matches your goals.
| Strategy | Best for | Example |
|---|---|---|
| Bestsellers | Social proof, proven sellers | Feature your top 20 products on rotation |
| Newest arrivals | Launch buzz, freshness | Auto-post new products the week they drop |
| Sale items | Urgency, clearance | Promote discounted products automatically |
| Specific collections | Themed campaigns | Feature your “Summer Collection” for 4 weeks |
| All products | Full catalog coverage | Rotate through everything over time |
The best approach? Combine strategies. Feature bestsellers 40% of the time, new arrivals 30%, and rotate collections for the remaining 30%. This keeps your feed diverse while pushing your strongest products.

Step 3: Configure AI captions with your Brand Voice
This is where auto-posting gets good. Instead of generic “Check out our product!” captions, AI writes in your actual brand voice.
How Brand Voice works:
- You define your brand’s tone. Casual? Professional? Playful? Set it once.
- The AI learns your style. It studies your tone preferences and writing patterns.
- Every caption matches your voice. Whether it’s an Instagram caption or a LinkedIn post, it sounds like you wrote it.
What the AI includes in product captions:
- Benefit-focused copy (not just product specs)
- Platform-appropriate length and style
- Relevant hashtags based on your niche
- A call-to-action (shop now, link in bio, etc.)
- Emojis calibrated to your preference (minimal, moderate, or heavy)
The result? Captions that could pass for hand-written. No one scrolling Instagram will think “this was auto-generated.” For more on AI content workflows, check our AI content creation guide.
Step 4: Choose platforms and set your schedule
Pick which platforms your products should appear on. Then set your weekly posting schedule.
Platform setup:
Select your connected accounts. Most Shopify stores post to at least 2-3 of these:
- Instagram: Product carousels and single images
- Facebook: Link posts with product pages
- Pinterest: SEO-rich pins that drive long-term traffic (Pinterest is underrated for Shopify)
- TikTok: Short-form product showcases
- LinkedIn: Professional product announcements
- X (Twitter): Quick product highlights
Schedule setup:
Set specific time slots for each day of the week. The system posts at those times automatically.
| Day | Time slot | Content type |
|---|---|---|
| Monday | 9:00 AM, 6:00 PM | Product post, Quote |
| Tuesday | 12:00 PM | Holiday or custom content |
| Wednesday | 9:00 AM, 3:00 PM | Product post, Product post |
| Thursday | 12:00 PM | Lifestyle content |
| Friday | 9:00 AM, 6:00 PM | Product post, Custom content |

All times adjust to your timezone. Set it for Eastern, Pacific, or wherever your audience lives.
One image, multiple platforms:
Here’s a time-saver. The system generates one product image and reuses it across platforms. But it writes unique, platform-specific captions for each one. Your Instagram caption is different from your LinkedIn post. Same product, different messaging.
Step 5: Choose draft mode or auto-publish
You have two options for how posts go live.
Draft mode (recommended to start):
Posts are created and queued for review. Nothing publishes until you approve it. This gives you full control.
- See every post before it goes live
- Edit captions, swap images, adjust timing
- Perfect for building trust in the AI output
Auto-publish mode (for when you’re confident):
Posts publish automatically at scheduled times. No review needed. You set it and walk away.
- Posts go live exactly on schedule
- No bottleneck from manual approvals
- Ideal after you’ve used draft mode for a few weeks and the output consistently matches your expectations
Most stores start with draft mode. After 2-3 weeks of reviewing AI-generated posts and making minimal edits, they switch to auto-publish. The AI gets better at matching your voice the more context it has.
Step 6: Launch and let it run
Hit generate. The system creates your content queue. Sometimes weeks of posts in one batch. Each post gets:
- A product image (from Shopify or AI-generated)
- A platform-specific caption in your Brand Voice
- Hashtags and keywords
- A scheduled publish time
Watch the first few posts go live. Check engagement. Adjust your product selection or schedule if needed. Then let it run.
Platform-specific tips for product posts
Each platform has different norms. Your auto-posting tool handles the formatting, but knowing these tips helps you configure better.
- Use square (1:1) or portrait (4:5) images for feed posts.
- Captions can be longer. Use the space to tell a story about the product.
- 5-15 relevant hashtags perform best.
- Include a CTA like “Link in bio” or “Shop now.”
- Product carousels (multiple images) get more saves and shares.
TikTok
- Vertical (9:16) format only.
- Short, punchy captions. 2-3 sentences max.
- 3-5 trending hashtags plus niche tags.
- Product-in-action content outperforms static product shots.
- Pair with trending audio when posting manually.
- Vertical (2:3) pins drive the most clicks.
- Write SEO-rich descriptions with keywords your customers search for.
- Pinterest is a search engine, not just social media.
- Pins keep driving traffic for months, unlike other platforms.
- Link directly to your product page.
- Landscape (1.91:1) or square images work best.
- Include a direct link to the product in the caption.
- Shorter captions tend to perform better on Facebook.
- Tag your Facebook Shop products when possible.
- 1-3 hashtags or none.
- Professional tone even for product posts.
- Focus on the story behind the product, not just the product itself.
- Great for B2B products or premium and artisan brands.
- Longer form captions that explain the “why.”
AI-generated images vs. product photos
You have two options for visuals in auto-posts.
Option 1: Use your Shopify product images
The simplest approach. The system pulls images directly from your product listings. No extra work needed. This works great if your product photos are already high quality.
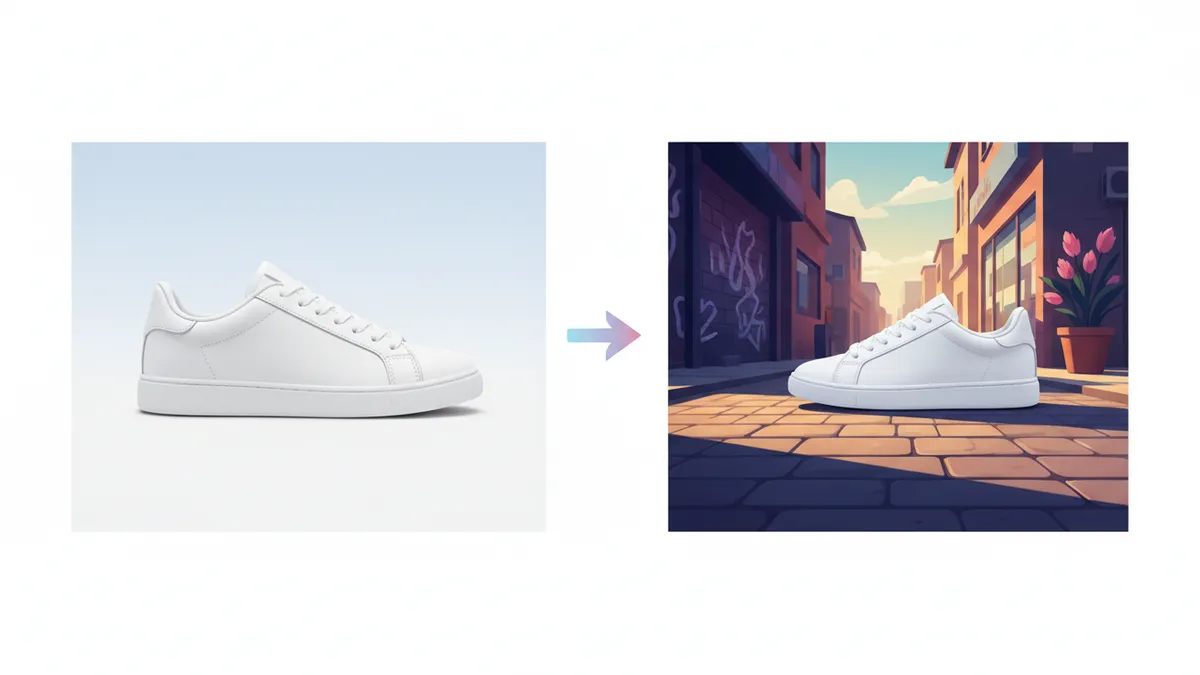
Option 2: AI-generated images
The system creates new images using your product photos as a reference. You pick a style:
- Photorealistic: Clean, studio-quality product shots.
- Lifestyle: Product shown in real-world context.
- Minimal: Simple, modern compositions.
- Bold: Eye-catching, vibrant visuals.
AI images are useful when your product photos are plain white-background shots but you want social content that feels more dynamic. The AI takes your product and places it in a styled context.
For tips on maximizing your product visuals, see our guide on turning product photos into social content.
Common auto-posting mistakes
Posting only products, nothing else. A feed full of product shots feels like a catalog, not a brand. Mix in lifestyle content, quotes, and educational posts. Aim for 60% product, 40% other content types.
Using the same caption style everywhere. Instagram and LinkedIn are different worlds. Make sure your tool generates platform-specific captions, not copy-paste across platforms.
Never reviewing your queue. Even on auto-publish, check your queue weekly. A product might sell out. A holiday might shift sentiment. A caption might need a tweak. Spend 15 minutes each Monday reviewing the week ahead.
Ignoring analytics. Auto-posting isn’t “set and forget forever.” Check which products get the most engagement. Which platforms drive the most store traffic. Double down on what works. Adjust what doesn’t. Learn more about what to automate and what to keep manual.
Posting at bad times. Use your scheduling tool’s timezone feature. Post when your customers are active, not when it’s convenient for you. Different platforms peak at different times.
Your auto-posting action plan
- Connect your Shopify store to an auto-posting tool that supports multi-platform publishing.
- Choose a product selection strategy. Start with bestsellers. They’re proven performers.
- Set up your Brand Voice. Define your tone so AI captions sound like you.
- Pick 2-3 platforms. Don’t spread too thin. Instagram + one more is a strong start.
- Set your weekly schedule. 5-7 product posts per week across platforms. Add 2-3 non-product posts for variety.
- Start in draft mode. Review the first 2 weeks of generated content. Edit as needed.
- Switch to auto-publish. Once you trust the output, let it run.
- Review weekly. 15 minutes each Monday. Check engagement, adjust your strategy.
Your products deserve to be seen. Auto-posting makes sure they are. On every platform, every week, without eating your entire schedule.
Ready to turn your Shopify catalog into a social media engine? Start free with IDEQO. The free plan includes 1 integration and 1 automation, so you can set up product auto-posting without paying a cent. No credit card required.
Frequently Asked Questions
Can I auto-post Shopify products to Instagram and TikTok?
Yes. Tools like IDEQO connect to your Shopify store and auto-publish product posts to Instagram, TikTok, Facebook, Pinterest, LinkedIn, and X. You set the schedule and the tool handles publishing.
Is auto-posting products bad for social media engagement?
No. Platforms don't penalize scheduled or auto-posted content. What matters is the quality of your visuals and captions. AI-generated captions with your Brand Voice perform just as well as manually written ones.
How do I choose which products to auto-post?
Use product selection strategies like bestsellers, newest arrivals, sale items, or specific collections. Rotate strategies to keep your feed fresh and highlight different parts of your catalog.
Can AI write good captions for product posts?
Yes, when combined with a Brand Voice profile. AI learns your tone and writes platform-specific captions that sound like you. You can review and edit before publishing, or let them go out automatically.
Should I review auto-posted content before it goes live?
It depends on your comfort level. Draft mode lets you review and approve each post. Auto-publish mode sends posts live on schedule without review. Most stores start with draft mode and switch to auto-publish once they trust the output.