
Shopify’s file editor has an AI image editor built in. It can strip the background off a product photo, place the product into a generated scene, and extend the edges of a square image so it fits a 4:5 feed post, a 9:16 Story, or a 2:3 Pin. For a limited time, Shopify Help says it is available on every plan at no additional cost (Shopify Help).
That solves the actual problem most Shopify stores have with social content. The product photos are fine. They are just square, on white, and shot for the product page. Social wants portrait, wants context, and wants a version for each platform. Select-Strip-Stage-Stretch is the order to do that in, one photo at a time, without leaving your admin.
Key Takeaways
- Select the right source photo: Shopify says clear subjects, good contrast, clean edges, and simple compositions work best, and every generated image comes back at about 1 megapixel. Use Save as new so the product page keeps its original.
- Strip for cutouts and brand colors: Color background replaces the background with a solid color or makes it transparent, with a Choose subject tool to fix the selection. Transparent results must be saved as PNG.
- Stage with short prompts: 3 to 7 words, separated by commas, with the product’s size and how it sits in the scene. The editor makes one scene at a time and deletes unsaved scenes when you close it.
- Stretch instead of cropping: Crop and transform plus the extend option fills new canvas around your product to reach 4:5, 9:16, or 2:3. Desktop only.
- Expect an AI label: Every generated image carries an invisible watermark. Meta, TikTok, and Pinterest label detected AI edits, and TikTok requires a label on realistic generated scenes.
Why use Shopify’s AI image editor instead of another app?
Because the photos are already there. The media editor opens wherever the edit icon shows on an image in your admin: product media, images in the online store editor, images in Shopify Email, and everything under Content > Files (Shopify Help). No export, no upload to a second tool, no re-import.
The AI part arrived in stages. Shopify started rolling out background removal and AI-generated backgrounds in the media editor in March 2024 (Shopify Changelog). In October 2025 it added the Generate panel, where you prompt changes to the scene or lighting in plain language (Shopify Changelog). In December 2025 it added generative image expansion, which extends an image past its original edges from the zoom slider in Crop and transform (Shopify Changelog). Those three tools are the whole workflow below.
Two more reasons it fits a Shopify store. Shopify does not claim ownership of the images you create with media generation and does not restrict where you use them, inside or outside Shopify (Shopify Help). And the media editor can revert an image to its original even after you have saved changes (Shopify Help), so experiments are cheap.
What it is not: a design tool. There are no templates, no text layers, no price stickers. It gives you a better photo. Turning that photo into a post with a caption, a hashtag set, and a schedule is a separate step, which is why this guide sits next to turning product photos into social content rather than replacing it.
The Select-Strip-Stage-Stretch framework
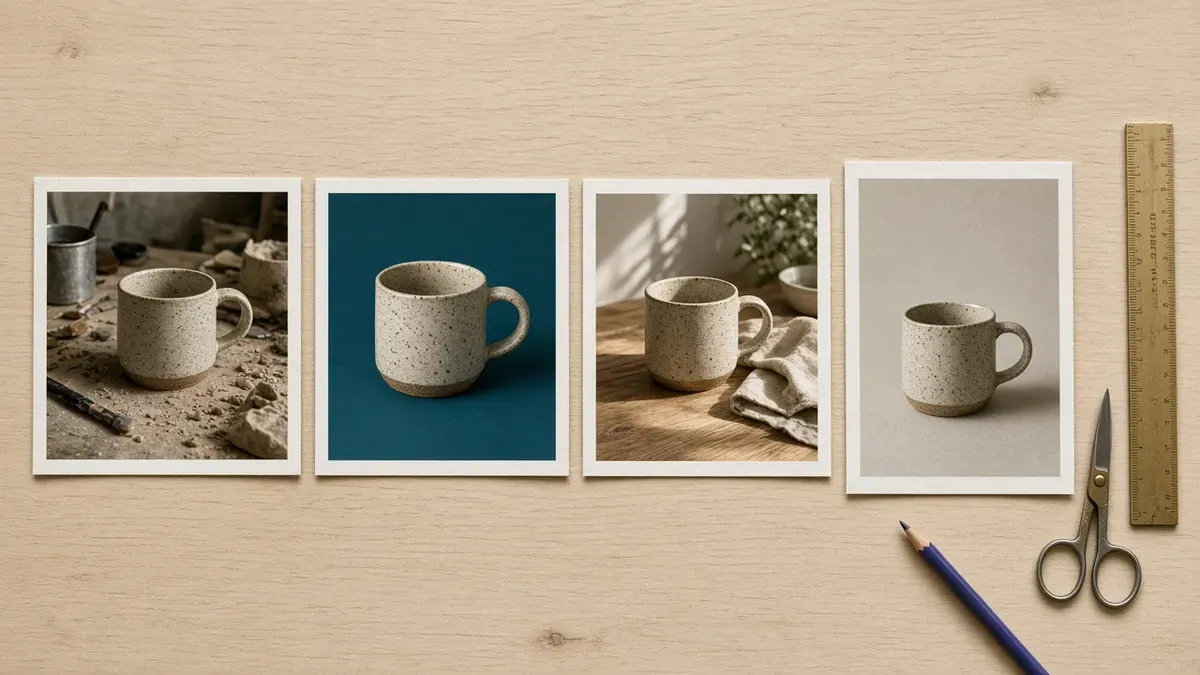
Select-Strip-Stage-Stretch runs in order for each product photo. Not every photo needs every phase. A brand-color grid post stops after Strip. A Pinterest hero runs all four.
Phase 1: Select
Goal: pick photos the editor can work with, and protect the originals.
Shopify’s own guidance is short. Use images with clearly visible subjects and good contrast, and expect images with clean edges and simple compositions to work better for background removal (Shopify Help). That describes a standard square packshot on white, which is what most Shopify catalogs already have. Shopify recommends 2048 by 2048 pixels for square product images and accepts files up to 5000 by 5000 pixels or 25 megapixels under 20 MB (Shopify Help).
Select checklist:
- Start with one bestseller. Pick the product with the cleanest packshot and the most social posts ahead of it. Run the whole framework on that SKU before you touch the rest of the catalog.
- Check the edges. Fuzzy textures, reflective glass, thin straps, and handles are where automatic subject detection needs help. They still work, but budget time for the Choose subject correction in Phase 2.
- Know the output size before you start. The default resolution for generated images is 1 megapixel, based on your source image’s aspect ratio. Larger images are scaled down and smaller ones are scaled up (Shopify Help). Your 2048 by 2048 packshot comes back at roughly 1000 by 1000. Aim your source photos close to 1 MP and stop expecting 4K.
- Open from the right place. For a single product, go to Products, open the product, and click the media thumbnail to open the file editor. For a batch, go to Content > Files and filter Used in to Product media, which lists every image across every product (Shopify Help).
- Decide Save versus Save as new. Product images display across your sales channels, including the online store and Shopify POS (Shopify Help). A lifestyle scene is great in a Story and wrong as the featured image in your cart. Use Save as new for every social version and leave the product page packshot alone.
- List the outputs per SKU. Feed 4:5, Story 9:16, Pin 2:3, TikTok 9:16. Write it down. Phase 4 goes faster when you know how many canvases you need.
Phase 2: Strip
Goal: a clean cutout, or the same product on your brand color.
Color background detects the subject automatically, replaces the background with a solid color or makes it transparent, and lets you correct the selection with Choose subject if the automatic pass missed part of the product (Shopify Help). You pick from Monochrome or Standard swatches, or enter a custom color code. That custom field is where your brand kit hex codes go.
Strip checklist:
- Run Color background first, then zoom. Check handles, straps, hair on plush items, and anything translucent at full size. Fix the selection with Choose subject before you save, not after you notice it in a post.
- Save transparent cutouts as PNG. Shopify says images with transparent backgrounds must be saved as new PNG files to keep the transparency; other formats cannot (Shopify Help). A cutout saved as JPEG comes back with a white box.
- Build one brand-color version per hero product. A consistent background color across ten product posts does more for a recognizable grid than any filter. It also gives your product launch teasers a shared look before the lifestyle photos exist.
- Keep cutouts for layered formats. Transparent PNGs are the raw material for Pinterest collages, Stories with product stickers layered over a photo, carousel cover slides, and gift guide grids that put six products on one canvas.
- Notice the missing shadow. A solid-color background removes the surface the product was sitting on. For a graphic grid post that is fine. For anything that should look like a photo, move to Phase 3 and let the generated scene ground the product.
- Do it on mobile when you need to. The Shopify app has a Background option with swatches and a custom color picker (Shopify Help), so a brand-color version of a new arrival can be made from the stockroom.
Phase 3: Stage
Goal: put the product in a believable scene using a short prompt.
The Generate panel takes natural language, but not conversation. Shopify’s guidance is specific: prompts should be at least 3 to 7 words, ideally short keywords or phrases separated by commas; long lists of instructions do not work because the prompter is not a chatbot (Shopify Help). Shopify suggests descriptors for location, lighting, color, size, and camera angle, and gives two tips that fix most bad results: include sizing information such as an 8 oz jar candle so the scene scales correctly, and say how the object is grounded, such as boots resting on floor against wall, so the product does not float.
Here are prompt recipes built on those rules. Swap in your product.
| Product | Prompt | What each part does |
|---|---|---|
| Candle | 8oz jar candle sitting on oak side table, warm evening lamp light, closeup | Size, grounding, lighting, camera distance |
| Boots | leather ankle boots resting on floor against white wall, overcast daylight, front shot | Grounding, location, lighting, angle |
| Skincare | 4oz glass bottle standing on marble bathroom counter, soft morning light, muted colors | Size, grounding, location, lighting, color |
| Mug | stoneware mug on wooden kitchen counter beside linen napkin, sunlight from window | Grounding, location, one prop, lighting |
| Pet collar | dog collar lying flat on kraft paper, studio lights, from above | Grounding, surface, lighting, angle |
| Jewelry | gold pendant necklace on grey linen, extreme closeup, warm even light | Surface, camera distance, lighting |
Stage checklist:
- One scene per generation. The editor creates one AI-generated scene at a time. You can generate more, but unused scenes are deleted when you close the editor unless you save them to your device (Shopify Help). Download anything you might want before you close.
- Change one phrase at a time. Shopify’s general AI guidance applies here: the same request will not always produce the same result, so refine in small steps and review before you accept (Shopify Help). Swap the lighting phrase, generate, compare. Then swap the location.
- Keep the product honest. The scene can change. The product cannot. If the generated scene makes a 4 oz bottle look like a 16 oz bottle, add the size and regenerate. Social posts about a product are marketing claims about that product, and the review posts you run next to them should match what people receive.
- Skip people and hands. Prompt for surfaces, rooms, and light. Generated people are the fastest way to a fake-looking post, and realistic-looking people are exactly what TikTok’s labeling rule targets (TikTok). If you want a human in the frame, that is a real photo or a UGC clip.
- Match the scene to the platform. A kitchen counter scene reads as a lifestyle Pin. A plain studio backdrop with warm light reads as a feed post. Stage for where the image is going, then Stretch to fit.
- Report anything wrong. Media generation has filters for harmful content, and you can flag a generated image with the report icon if something inappropriate gets through (Shopify Help).
Phase 4: Stretch
Goal: reach each platform’s aspect ratio by extending the background, not by cropping the product.
This is the phase that makes square catalogs usable on vertical platforms. In Crop and transform you select an aspect ratio, use the slider to enlarge the canvas around your subject, then click the image magic icon to extend the background into the new space. Shopify calls it outpainting, and it is not available in the mobile app (Shopify Help).
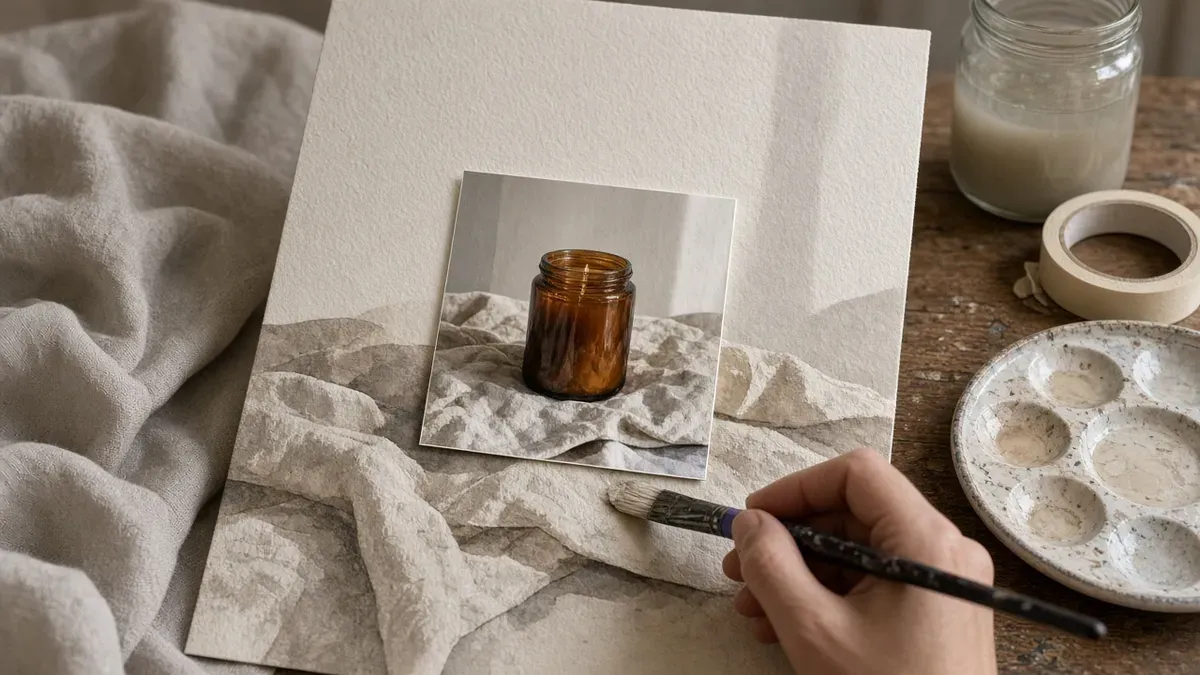
Where the extended versions need to land:
| Where it goes | Ratio to select | What the platform says |
|---|---|---|
| Instagram feed and carousels | 4:5 or 3:4 | Instagram keeps original resolution for photos 320 to 1080 pixels wide with an aspect ratio between 1.91:1 and 3:4; unsupported ratios are cropped to fit (Instagram Help) |
| Instagram Stories | 9:16 | Meta recommends 9:16 for Stories, with a minimum width of 600 pixels (Meta for Developers) |
| Pinterest Pins | 2:3 | Pinterest recommends 2:3, or 1000 by 1500 pixels; Pins with a taller ratio may be cut off in feeds (Pinterest Business Help) |
| TikTok photo posts and Shoppable Carousels | 9:16 | TikTok Shop Academy asks for 9:16 with the product filling roughly 40 to 60 percent of the frame (TikTok Shop Academy) |
Stretch checklist:
- Extend from a Strip or Stage result, not the cluttered original. A solid color or a generated scene continues cleanly past the edge. A busy studio bench with tools half in frame does not.
- Keep the product in the middle 60 percent of a vertical canvas. Platform buttons, captions, and stickers sit at the top and bottom of Stories and TikTok posts. Extend more on both ends than you think you need.
- Do the resolution math. A 1 MP output at 9:16 is roughly 750 by 1333 pixels, and at 2:3 roughly 816 by 1224. Instagram will keep those as uploaded because they are within its supported width range (Instagram Help). Pinterest’s 1000 by 1500 recommendation is not met. For hero Pins where sharpness sells, shoot a vertical frame using the two-for-one rule from the TikTok carousel guide and use Stretch for the rest.
- Download the versions you will post manually. Click the image thumbnail, then the download icon in the preview to save it to your device (Shopify Help). If your final pixel dimensions need a nudge, IDEQO’s free image resizer crops to platform presets in the browser without uploading the file.
- Write the alt text before you leave. The media editor may suggest AI-generated alt text for images that lack it; accept, edit, or replace it, and keep it around 125 characters or less (Shopify Help). That alt text travels with the image in your store and gives you a ready caption starter.
Which edit goes with which post?
Most stores overuse Stage and underuse Strip. Here is the split that keeps a grid looking like one brand.
| Post type | Phases | Output | Where it runs |
|---|---|---|---|
| Product spotlight, feed | Select, Strip, Stretch | Brand-color background, 4:5 | Instagram feed, Facebook |
| Launch teaser | Select, Strip | Cutout PNG for a layered graphic | Launch plan Hint posts |
| Lifestyle Story | Select, Stage, Stretch | Generated scene, 9:16, product centered | Instagram Stories with a product sticker |
| Pinterest hero | Select, Stage, Stretch | Generated scene, 2:3 | Standard Pin with a product tag |
| Pinterest collage | Select, Strip | Three to five cutout PNGs | Collage with shoppable cutouts |
| TikTok carousel frames | Select, Strip or Stage, Stretch | Five to seven 9:16 frames, same background treatment | Shoppable Carousel |
| Gift guide grid | Select, Strip | Six cutouts on one brand-color canvas | Gift guide Pitch posts |
| Shopify Email hero | Select, Stage | Generated scene, original ratio | Edited inside the email editor, where the media editor also works |
Schedule the Strip pass for a whole collection as one dated task in your content calendar. Stage and Stretch happen per post, when you know where the image is going.
What about AI labels and disclosure?
Assume a label can appear, and plan around it.
Shopify applies an invisible watermark to all generated images. It does not restrict commercial use, and it cannot be removed (Shopify Help). Shopify does not publish which technical standard the watermark uses, so you cannot know in advance whether a given platform will read it.
The platforms each have their own rule:
- Meta. Facebook, Instagram, and Threads add an AI info label when Meta detects industry-standard AI image indicators or when the person posting discloses AI-generated content (Meta Transparency Center).
- TikTok. Creators are required to label AI-generated or significantly edited content that shows realistic-looking scenes or people. Unlabeled content may be removed, restricted, or labeled by TikTok (TikTok). TikTok also applies the label automatically when it recognizes C2PA Content Credentials on an upload (TikTok Help).
- Pinterest. Pinterest adds an AI modified label on the Pin close-up when its systems detect AI generation or modification through IPTC metadata or its own classifiers, or when the content owner indicates it (Pinterest Help).
The working rule for Select-Strip-Stage-Stretch:
- A Strip result on a solid brand color is a background swap on a real product photo. Post it like any product graphic.
- A Stage result is a realistic-looking generated scene. On TikTok, turn on the AI-generated label. On Instagram and Pinterest, expect a label and do not fight it.
- Never caption a Stage result as a customer photo, a real room, or a real event. Real proof comes from reviews and UGC, and mixing the two is how a store loses the trust that makes UGC work.
Mistakes that waste the free tool
Overwriting the featured image. Save as new exists for a reason. The packshot on your product page, in your cart, and on POS should stay a packshot.
Saving a cutout as JPEG. The transparency is gone and you have a white box. PNG, every time.
Writing a paragraph prompt. The Generate panel wants 3 to 7 words in comma-separated phrases, not instructions. “Please put this candle in a cozy living room with a fireplace and make it feel like autumn” is a chatbot request. “8oz jar candle sitting on wooden mantel, warm fireplace light, closeup” is a prompt.
Cropping to 9:16 instead of extending. Cropping a square packshot to portrait throws away the sides of the image and often the product’s edges. Extend the canvas first, then adjust the framing.
Expecting print resolution. Output is 1 MP. Plan the hero Pins around real vertical photos, and use the editor for volume.
Closing the editor with a good scene unsaved. Unused scenes are deleted when the session ends. Download first.
Leaving the alt text blank. The suggestion is right there in the editor, and it costs nothing to accept and tidy.
Generating people. Realistic people trigger labeling rules and look wrong. Keep generated scenes to rooms, surfaces, and light.
FAQ
Is Shopify’s AI image editor free?
For a limited time, Shopify Help says media generation in the file editor is available on all Shopify plans at no additional cost. That covers Color background, Generate, and the Extend option inside Crop and transform. The standard media editor tools, such as crop, resize, rotate, draw, and alt text, are regular admin features. Check the Shopify Help page for the current terms before you plan a quarter around it.
Can I use Shopify’s AI-generated product images on Instagram, TikTok, and Pinterest?
Yes. Shopify Help says Shopify does not claim ownership of images merchants create with media generation and does not restrict where they can be used, inside or outside Shopify. Two things to know: every generated image carries an invisible watermark that cannot be removed, and Meta, TikTok, and Pinterest all label content they detect as AI-generated or AI-modified. TikTok also requires you to label AI-generated or significantly edited content that shows realistic-looking scenes.
Where is the AI image editor in the Shopify admin?
Anywhere the edit icon appears on an image: product media, images in the online store editor, images in Shopify Email, and Content > Files. Click a thumbnail to open the file editor, then use Color background, Generate, or Crop and transform. It is not available in the rich text editor. On the Shopify mobile app you can use Background and Generate on images, but extending an image beyond its edges is desktop only.
Why does my generated image look softer than the original product photo?
Because the default output is 1 megapixel. Shopify Help says generated images are produced at about 1 MP based on the aspect ratio of your source image; larger images are scaled down and smaller ones are scaled up. A 2048 by 2048 product photo comes back at roughly 1000 by 1000 pixels. That is fine for an Instagram feed post, which keeps original resolution up to 1080 pixels wide, but it sits under Pinterest’s recommended 1000 by 1500 for a 2:3 Pin.
Do I have to disclose that a product image was edited with AI?
It depends on the edit and the platform. TikTok’s Community Guidelines require creators to label AI-generated or significantly edited content that shows realistic-looking scenes or people, so a generated kitchen or park scene around your product should carry TikTok’s AI-generated label. Meta applies an AI info label when it detects industry-standard AI indicators or when you disclose. Pinterest adds an AI modified label based on IPTC metadata, its own classifiers, or your disclosure. Shopify’s invisible watermark means you should expect a label to appear, so never present a generated scene as a real customer photo.
Start Select-Strip-Stage-Stretch this week
- Select: Open your best-selling product, check the packshot for clean edges and good contrast, and commit to Save as new for every social version.
- Strip: Make one brand-color version and one transparent PNG cutout. Zoom in and fix the selection with Choose subject.
- Stage: Write a 3 to 7 word prompt with the product’s size and how it sits in the scene. Generate, change one phrase, generate again, and download the keeper.
- Stretch: Extend the best result to 4:5, 9:16, and 2:3. Add alt text, then post with the right AI label where the platform asks for one.
One square packshot becomes a feed post, a Story, a Pin, and a carousel frame in about fifteen minutes, and the product page never changes.
If you want those saved-as-new images pulled straight into posts, IDEQO connects to your Shopify store and pulls in your product photos, descriptions, and prices, so the Strip pass for a collection and the posts that use it can sit as dated tasks in IDEQO’s content calendar. Start free with IDEQO. Free plan available. No credit card required.
Frequently Asked Questions
Is Shopify's AI image editor free?
For a limited time, Shopify Help says media generation in the file editor is available on all Shopify plans at no additional cost. That covers Color background, Generate, and the Extend option inside Crop and transform. The standard media editor tools, such as crop, resize, rotate, draw, and alt text, are regular admin features. Check the Shopify Help page for the current terms before you plan a quarter around it.
Can I use Shopify's AI-generated product images on Instagram, TikTok, and Pinterest?
Yes. Shopify Help says Shopify does not claim ownership of images merchants create with media generation and does not restrict where they can be used, inside or outside Shopify. Two things to know: every generated image carries an invisible watermark that cannot be removed, and Meta, TikTok, and Pinterest all label content they detect as AI-generated or AI-modified. TikTok also requires you to label AI-generated or significantly edited content that shows realistic-looking scenes.
Where is the AI image editor in the Shopify admin?
Anywhere the edit icon appears on an image: product media, images in the online store editor, images in Shopify Email, and Content > Files. Click a thumbnail to open the file editor, then use Color background, Generate, or Crop and transform. It is not available in the rich text editor. On the Shopify mobile app you can use Background and Generate on images, but extending an image beyond its edges is desktop only.
Why does my generated image look softer than the original product photo?
Because the default output is 1 megapixel. Shopify Help says generated images are produced at about 1 MP based on the aspect ratio of your source image; larger images are scaled down and smaller ones are scaled up. A 2048 by 2048 product photo comes back at roughly 1000 by 1000 pixels. That is fine for an Instagram feed post, which keeps original resolution up to 1080 pixels wide, but it sits under Pinterest's recommended 1000 by 1500 for a 2:3 Pin.
Do I have to disclose that a product image was edited with AI?
It depends on the edit and the platform. TikTok's Community Guidelines require creators to label AI-generated or significantly edited content that shows realistic-looking scenes or people, so a generated kitchen or park scene around your product should carry TikTok's AI-generated label. Meta applies an AI info label when it detects industry-standard AI indicators or when you disclose. Pinterest adds an AI modified label based on IPTC metadata, its own classifiers, or your disclosure. Shopify's invisible watermark means you should expect a label to appear, so never present a generated scene as a real customer photo.